|
||||||||||||||||||
Premium Patterns Wintry Mix Mitts Love Bytes HawkeyeFree Patterns Kiddie Cadet Summerlin Ruffled Scarf Seamless DS Sock Simply Seamless Pouch Myriads of MushroomsExtras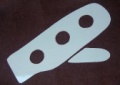 DIY Mitten Blocker Felt Patch Tutorial Yarn Dyeing Tutorial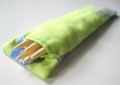 Needle Pouches Knitting Journal |
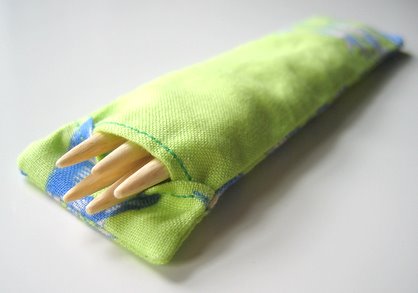
Double Pointed Needle PouchesDesigned by Grace Schnebly
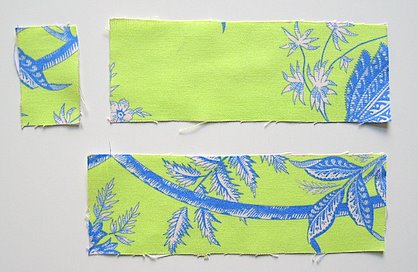
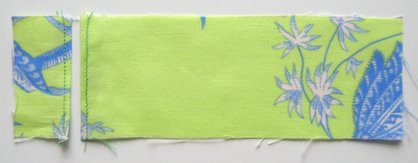
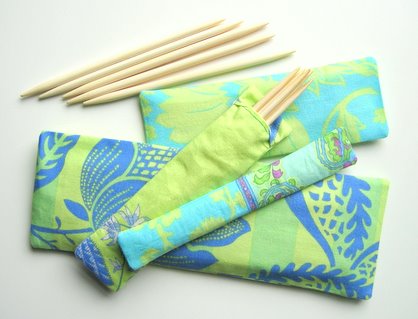 Once I started to collect more and more sets of double pointed needles, it became almost impossible to keep them together! It was such a pain to find all of the needles in the set, and I figured it was only a matter of time before I lost them. I designed these pouches out of pure necessity. They’re super easy to make, require very little fabric, and you won’t have to mess around with snaps or buttons. Make a pouch for each one of your double pointed needle sets and they won’t get separated again! These pouches are also great for when you take your knitting on the go an only need to bring one set of needles with you. You can embroider the needle size on the outside of the pouch, or attach a number shaped button for easy reference. MaterialsSmall amount of material; I used fabrics from Amy Butler's Charm line in the Zest colorway. Tutorial1. You will need to cut three rectangles from your fabric. You will be cutting one of each Front Panel, Lower Back Panel, and Upper Back Panel pattern pieces.
5. Turn pouch right-side-out. Use knitting needle to push the corners of your pouch into crisp points then iron. Insert your needles and you’re finished!
|
   Recent ReviewsRecent Posts
 Our Favorites
|
||||||||||||||||
| © 2007 KathrynIvy.com | ||||||||||||||||||