|
||
March 24, 2008 - Posted by Alice SchneblyFamily of Thorpes Project Specs
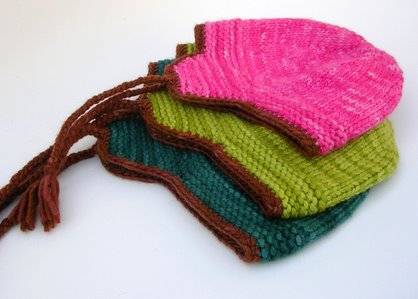
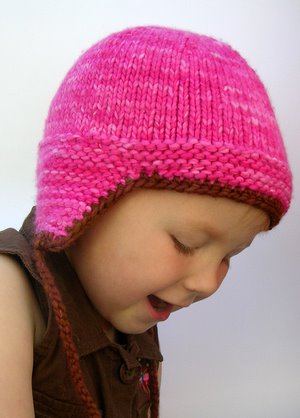
Camdyn’s hat is knit using the numbers for the medium size, but at the same smaller gauge. I knit for 2 ½” following the increases before working the band, and it turned out being the perfect size for a three year old. I really loved being able to try the hat on Camdyn a couple times while knitting to get it just right. For Cam’s hat I used Malabrigo Worsted held doubled instead of a chunky weight yarn. This knit up at the exact same gauge as Malabrigo Chunky for me, but I think it lost a bit of impact that the semi-solid colors normally have when knit up. Instead of the gradual shift in shades, there is a more of a marled appearance. I still love the brightness of Shocking Pink, though. It is the perfect color for a little girl!
Knit the pattern as directed until you are ready to begin the first purled round of the brim. Remove your stitch marker that is marking the beginning of the round. Slip one stitch from left hand needle to right hand needle, purlwise with yarn in back. Replace stitch marker. Purl around (this will include the stitch that you slipped before). Remove your marker and once again slip a stitch from LH needle to RH needle. Replace marker. Knit around. You will continue in this manner, moving the start of the round over one stitch each time, until you have completed the number of garter ridges as directed by the pattern. On your next round you will be binding off stitches at the front, and from there you can work back and forth in garter stitch as normal. Now it’s nearly invisible where you changed from knit to purl rounds on the brim! No visible garter line! I think this would be a fun technique to try out on various other projects. The more and more I thought about it, I think this would work awesome for the yoke on the Cobblestone sweater if you’re not too fond of the line the garter stitch creates on the back. Of course in a large project like a sweater it would also help to keep a stitch marker at the original beginning of the round as well because you may need it as a reference for other instructions in the pattern.
Even though Thorpe was a simple pattern to knit, I still feel a huge sense of accomplishment. This was my first successful crochet! I bought the Stitch ‘n Bitch Happy Hooker Book a long time ago with the intent to learn how to crochet, but I could never wrap my head around it. I actually have a gorgeous hat that has been sitting around for months now awaiting a single crochet edging. I even thought about the ways that I could finish off my Thorpe hats that didn’t involve crochet, but in the end I decided it really gives the hat that extra something. I don’t know what it was, but this time when looking at the Happy Hooker, everything just seemed to make sense. Half double crochet is my friend! I still can’t do single or double crochet, but at least next time I attempt it I’ll have a little more confidence. It seems every time I read Kirsten’s blog she’s always designing something new. Most recently, her design Dr. G’s Memory Vest caught my eye. I absolutely love all the unique cables, especially the tree cable right up the front! Kenny is always asking for me to knit him a sweater vest, and this one is couldn’t be more perfect. The pattern is available by making a donation through her blog to the Fisher Center for Alzheimer's Research Foundation, and Kristen has already raised over $1000 from her pattern. How awesome is that?  |
|
|
| © 2007 KathrynIvy.com | ||


