Project Specs
Pattern: Chevalier Mittens (Google doc)
Pattern Source: Designed by Tikru of MadeByMyself
Yarn: Araucania Nature Wool in #06, less than one skein (155 yards)
Needles: Size US5 DPNs
Date started: 11/19/07
Date completed: 11/25/07
Modifications: Omitted rows 75-78, changed some of the knit stitches in the cables to purl, added an extra decrease row at the tip of each mitten.
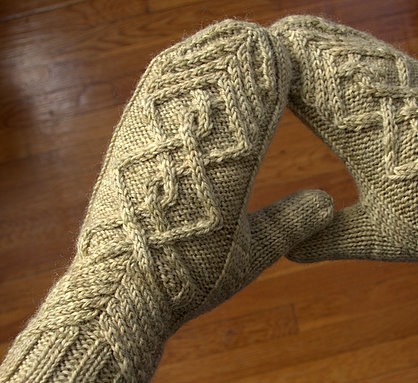
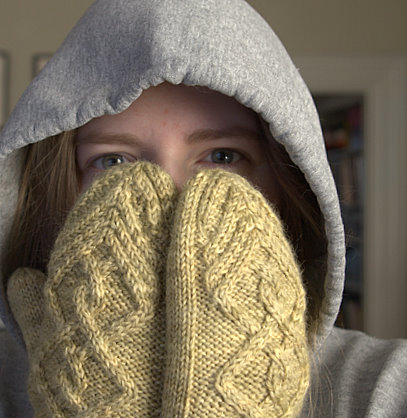
Looks like I’ve been bitten by the mitten bug too! After watching Alice knit all of those beautiful pairs of mittens, I just had to knit a pair myself. I first saw the Chevalier Mittens pattern on Flickr about a month ago and immediately fell in love with the cable pattern. They’re really unique, and since I’ve been so into cabling lately that I cast on as soon as I got the chance. Although I won’t be keeping this pair for myself (yep, yet another Christmas present for a friend), I totally love the way they turned out! Luckily I am almost finished with my gift knitting and will actually get to knit for myself again soon.
 The pattern suggests using a fingering weight yarn held double throughout. I don’t have much fingering weight yarn around here, so I decided to substitute it with a single strand of Nature Wool (god knows I’ve got plenty of that!). I tried to pick a colorway that didn’t have too much color variation as to not detract from the cable pattern. My gauge didn’t exactly match the suggested gauge, but I went for it and was really pleased with how it worked out! I did end up having to omit one chevron (rows 75-78) at the tip of the mittens because they were turning out a little too long. It is so easy to adjust the length of these mittens though, and it seems like they could be worked to fit any sized hand. Also, I think the pattern would look great on both women and men. Nature wool seems like the perfect yarn for these mittens, and I ended up using only two thirds of the skein.
 I like how the pattern is basically just two charts, one of the back and one for the plam. If you haven’t worked cables using a chart, trust me it is easy once you get the hang of it! Don’t be intimidated by all the dashes and slashes, just be sure to keep a highlighter handy to mark off the rows you’ve completed and it will be a breeze. I did change some of the cabling slightly. For consistency through the mitten, I changed some knitted cable stitches to purl when the stitch directly above it on the chart was a purl stitch. After trying the cables as originally detailed in the chart, I though this produced a crisper looking cable and a smoother purl background. When all stitches in every cable were knit, the purl background became bumpy.
Since the pattern wasn’t really clear what to do after you’ve finished knitting the chart, I added an extra decrease row at the tip of each mitten. Once completing the chart, work the following row one time: p2tog, ssk, k2tog, p2tog, (ssk) 2x, (k2tog) 2x. You’ll end with 8 stitches on the needles. Break yarn and thread through these stitches, pull tight and thread end through center to inside of mitten. For another good modification to the tip of these mittens, check out Storm Moon Knits.
This pattern was lots of fun to knit and I can’t wait to give these mittens to my friend! She lives here in Boston with me, so I know she’ll be able to get a lot of use out of them. Hopefully some day I’ll get around to making a pair for myself!


